The Best {DIY} Burp Cloth
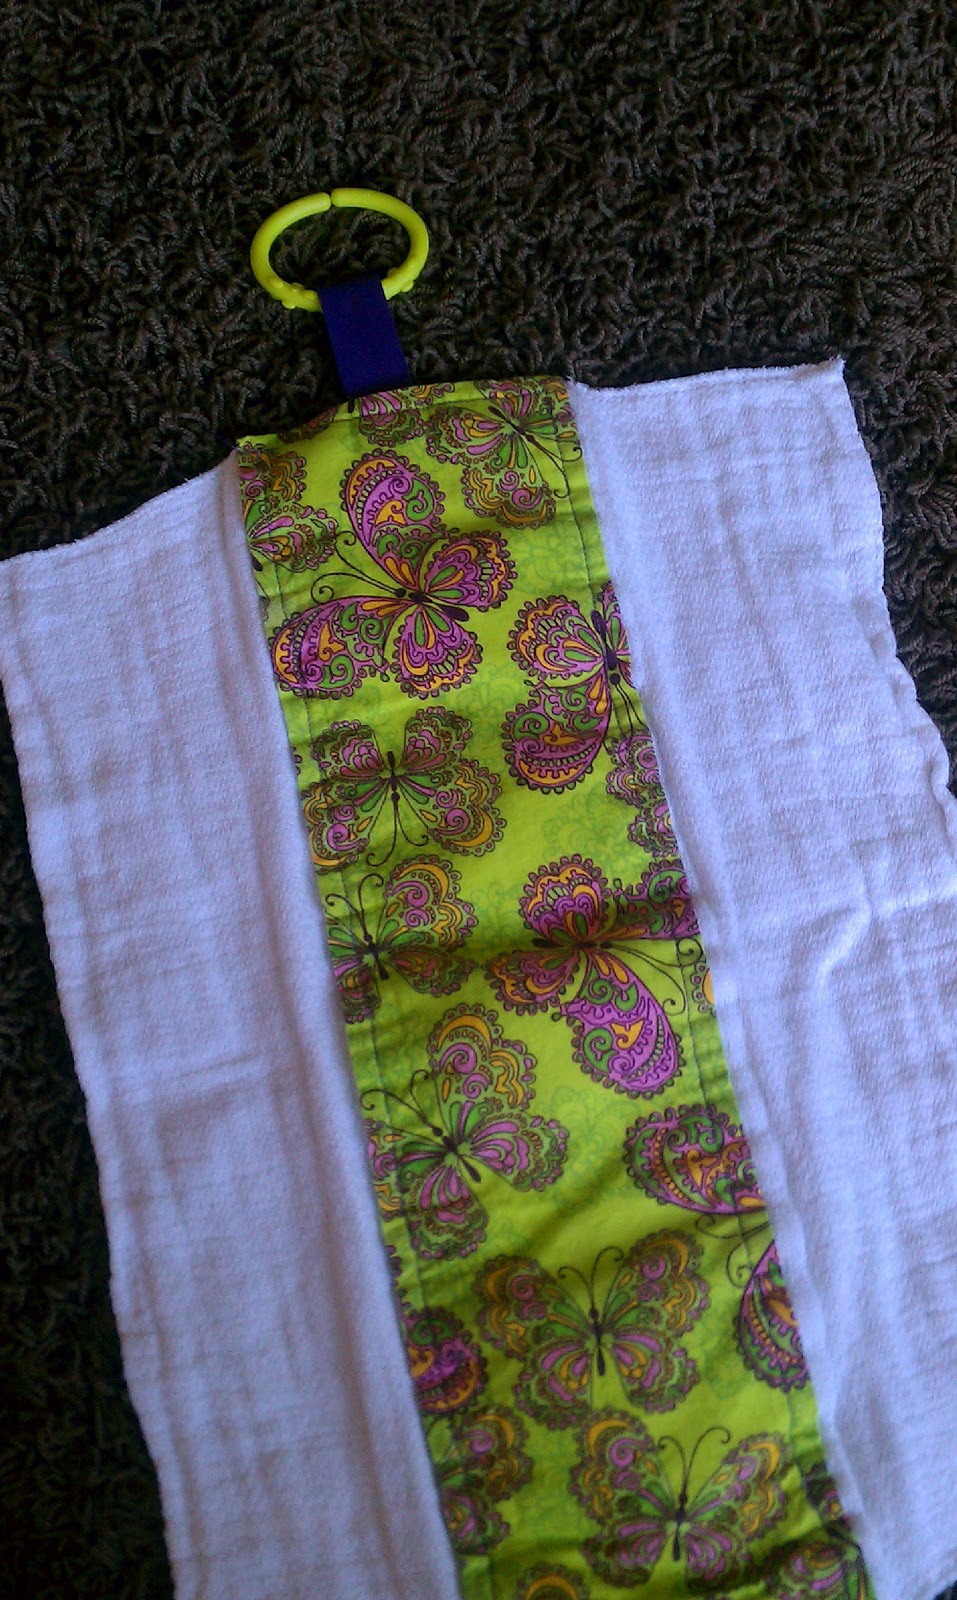
I purchased a 12-pack of generic burp cloths...aka "cloth diapers" at BRU. Then, we went to JoAnn Fabrics and browsed the bolts of fabric before deciding to purchase "fabric squares" in 4 varied patterns. We anticipated each fabric square yielding 3 burp cloths. I told Lynnae, my goal was to include a loop of fabric or ribbon on the end, enabling me to connect burp cloths via a "link" to everything - car seat, stroller, diaper bag, etc. The way my Miss L spits up, I really need to link a burp cloth to my belt loop!
Hint: These would make an excellent baby shower gift!
Here are Lynnae's step-by-step instructions:
Step one: Iron everything to make the fabric and the burp cloth easier to work with.Step two: Take measurement and decide what size you want the section of fabric to be. Add an inch to your desired length and width to include the half inch seam allowance. Folding the fabric under a half inch from the edge and ironing it down before you pin and sew it will leave you with a nice finished edge.
Step three: Cut enough ribbon or fabric to make a loop from which you can hang the burp cloth or attach it to a car seat, diaper bag, play set, etc. My ribbon was about 8" long but you can easily use something shorter.
Step four: Pin the fabric and the ribbon to one side of your burp cloth. You can eye ball it to place it in the middle or you can use your measurements to find the middle of the burp cloth and the fabric and then line them up.
Step five: Sew all the way around the edge of the fabric, removing your pins along the way and making sure your loop get sewn in too. I kept the edge of the fabric even with the edge of the presser foot which leaves a consistent seam. Go slowly if you're not comfortable sewing. It's better to take your time and have a nice seam than go too fast and have it look sloppy. There's a difference between the homemade look and something that's just a disaster.
Step six: Admire your new, stylish burp cloth that will surely make the other moms envious.
 |
| Measure the fabric accordingly |
 |
| Use a oil pastel crayon to mark your measurements |
 |
| Each fabric square yielded 3 - 6" burp cloth centers |
 |
| Note the 1/2 " seam allowance |
 |
| It is fun to coordinate complementing ribbon and thread |
 |
| The finished product...just perfect!! |
Tips: Choose fabric that will be able to handle the various "liquids" that end up on a burp cloth. Don't choose something that will stain easily. Use a thread in your bobbin that matches your burp cloth if you don't want it to be seen on the back side of the burp cloth.
Of course, I must thank my sister, Lynnae, for executing this flawlessly and far exceeding my expectations. Thank you!!!


So funny! I have the materials to do this exact same thing, I just haven't had time to sit down and do it yet. Great minds! :)
ReplyDeleteI just bought 6 burp cloths just like this (sans rings) from an Etsy shop. Thought about making a little profit off of these???
ReplyDelete